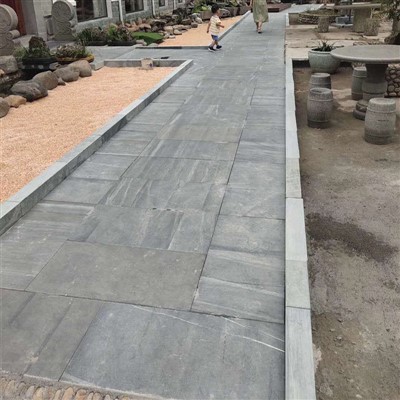
Hey there! I'm an expert in Blue Slate Patio Slabs, and I run a business supplying these beautiful slabs. Today, I'm gonna share with you how to install Blue Slate Patio Slabs on a brick base. It's not as hard as it might seem, and I'll walk you through every step.
Preparing the Brick Base
First things first, you need to make sure your brick base is in tip - top shape. Check for any loose bricks. If you find some, use a masonry adhesive to fix them back in place. You don't want your patio slabs to wobble later on because of a shaky base.
Clean the brick surface thoroughly. Remove any dirt, debris, or moss. You can use a stiff - bristled brush and some water to do this. If there's stubborn dirt, a mild detergent can help. Make sure to rinse it off well and let the bricks dry completely. This is important because if the bricks are wet when you start installing the slabs, it can affect the adhesion.
Measuring and Planning
Now, it's time to measure the area where you'll be installing the Blue Slate Patio Slabs. Grab a tape measure and get the length and width of the space. Write these measurements down. You'll use them to figure out how many slabs you need.
Lay out the slabs on the brick base without actually attaching them. This is called dry - laying. It helps you see how the slabs will fit together and if you need to make any cuts. You can use a chalk line to mark where the slabs will go. This will give you a straight and even pattern.
When you're dry - laying, think about the pattern you want. You can go for a simple running bond pattern, where each row of slabs is offset by half a slab. Or, if you're feeling more creative, you can try a herringbone pattern. It looks really cool but might be a bit more challenging to install.
Getting the Right Tools
Before you start the actual installation, gather all the tools you'll need. You'll need a trowel for applying the adhesive, a rubber mallet to tap the slabs into place, a level to make sure the slabs are flat, and a tile cutter if you need to make any cuts.
You'll also need a good quality masonry adhesive. Make sure to choose one that's suitable for outdoor use and can bond well with both the brick base and the Blue Slate Patio Slabs.
Applying the Adhesive
Once you have everything ready, it's time to apply the adhesive. Squeeze a small amount of adhesive onto the brick base using the trowel. Spread it out in a thin, even layer. The layer should be about 1/4 inch thick.
Don't apply too much adhesive at once. You want to work in small sections so that the adhesive doesn't dry out before you place the slabs. A good rule of thumb is to do an area that's about the size of one or two slabs at a time.
Placing the Slabs
Carefully pick up a Blue Slate Patio Slab and place it on the adhesive. Press it down firmly with your hands. Then, use the rubber mallet to gently tap the slab into place. Make sure it's level using the level tool. If it's not level, you can lift the slab slightly and add or remove some adhesive to adjust it.
Continue placing the slabs one by one, following the pattern you planned during the dry - laying. Leave a small gap between each slab. This gap is called a joint, and it's important because it allows for expansion and contraction of the slabs due to temperature changes. A gap of about 1/8 to 1/4 inch is usually good.
Making Cuts
There will probably be some areas where you need to make cuts to fit the slabs. This is where the tile cutter comes in handy. Mark the area on the slab where you need to cut using a pencil. Then, carefully cut the slab along the marked line using the tile cutter.
Be extra careful when making cuts. Wear safety goggles to protect your eyes from any flying debris. If you're not comfortable making cuts, you can always ask someone with more experience to help you.
Filling the Joints
After all the slabs are in place, it's time to fill the joints. You can use a jointing compound for this. Mix the jointing compound according to the manufacturer's instructions.
Use a pointing trowel to fill the joints with the compound. Make sure to press the compound into the joints firmly so that there are no gaps. Then, use a damp sponge to wipe off any excess compound from the surface of the slabs.
Finishing Touches
Once the jointing compound is dry, give the patio a final cleaning. Use a broom to sweep away any loose debris. You can also use a power washer on a low setting to clean the surface of the slabs.
Now, your Blue Slate Patio Slabs on the brick base are all set! It looks amazing, doesn't it?
Why Choose Blue Slate Patio Slabs
Blue Slate Patio Slabs are a great choice for your outdoor space. They're durable and can withstand different weather conditions. They also have a natural, rustic look that can add a lot of charm to your patio.
If you're interested in seeing more examples of how Blue Slate Patio Slabs can be used, check out these links: Bluestone Slab Walkway, Bluestone Paving Slabs, and Large Bluestone Slabs.


Connect with Us
If you're thinking about purchasing Blue Slate Patio Slabs for your project, we'd love to talk to you. Whether you have questions about the installation process, the different types of slabs we offer, or just want to get a quote, feel free to reach out. We're here to help you create the perfect outdoor space with our high - quality Blue Slate Patio Slabs.
References
- "Outdoor Masonry Handbook" by Masonry Institute
- "Guide to Patio Installation" by Home Improvement Association